Printing Address Label Stickers with Outlook Contact information
I bought a sheet of paper with self-sticking labels and was hoping to be able to print label stickers for envelopes with addresses from Contacts that I store within Outlook.
However, now that I have them, I have no clue where to start and how to make sure that the addresses will be properly aligned on my sheet of label paper.
Do I need special software for this or can I print on this label sheet directly from within Outlook?
 Printing address label stickers from Outlook Contacts is possible with a little bit of help of Word.
The process may seem long and complex but it is actually quite easy and quickly to do. You only have to configure the dimensions of your label sheet once.
In general, I like to create my labels directly from Word but in some cases it is better to start the process in Outlook.
When you frequently need to print labels, using a dedicated Label Printer might be a better alternative to you.
Preparation: Configure the Label Sheet in Word
 If you haven’t done so already, it is best to configure your Label Sheet in Word before starting the label printing process. This is a one time configuration and you only have to change it when you get a new label sheet with different dimensions.
- Open Word.
- Select the Mailings tab.
- Press the Labels button on the left.
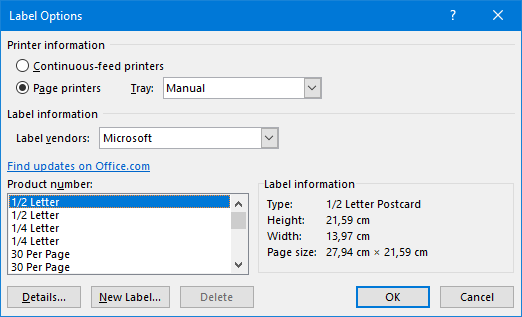
In the dialog that opens, click on the Options… button.
- Check in the “Label vendors” dropdown list whether you brand and type is listed. If so, select it and press OK. You are done and don’t have to perform the next steps.
- If your label sheet type isn’t listed, click on the “New Label…” button.
- Fill out the form so it will match the dimensions of your label sheet.
- Provide a name for your custom label.
- Select the page size and its orientation first. When it doesn’t indicate an orientation, portrait orientation is used.
- Top margin and Side margin
Top and left-side margin for the label in the top-left corner. - Label height and Label width
The height and width of a single label.- Extra tip!
By using smaller dimensions than the actual label, you can create margins.
- Extra tip!
- Vertical pitch and Horizontal pitch
- Vertical pitch
The distance from the top-side of a label to the top-side of the label below it. - Horizontal pitch
The distance from the left-side of a label to the left-side of the label next to it.
- Vertical pitch
- Number across and Number down
Simply count how many labels there are on the sheet.
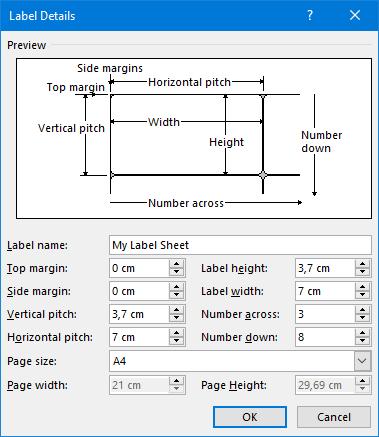
Configuration for an A4 label sheet with 24 (3x8) labels.
Method 1: Creating labels starting in Word
 Creating your labels from Word is the easiest method and can be done very quickly (although the amount of steps below might suggest otherwise, you’ll got through them very fast!).
- Select the Mailing tab.
- Click on the Start Mail Merge button and select: Labels.
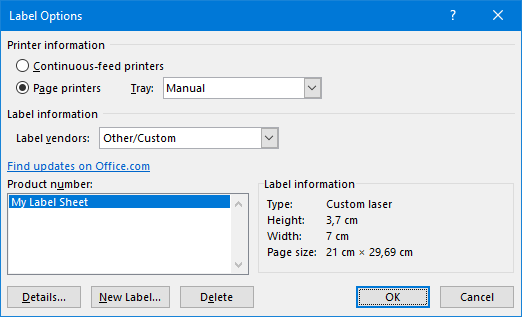
Your label sheet layout should already be selected. If not, select it again. If you have created your own label sheet configuration in the previous step, it is listed under: Other/Custom.
- When you have a printer with multiple paper trays, you can select it here as well. When your printer is equipped with a manual feeder, it is recommended to use that as it usually is designed to process special or thicker paper like a label sheet.
- Press OK.
- You are now returned to your document which has the layout of your label sheet. You may not actually see the individual labels but you will see them when you enable gridlines for your document;
- tab Layout-> View Gridlines
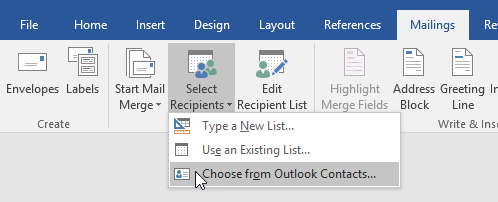
On the Mailings tab, choose: Select Recipients-> Choose from Outlook Contacts…
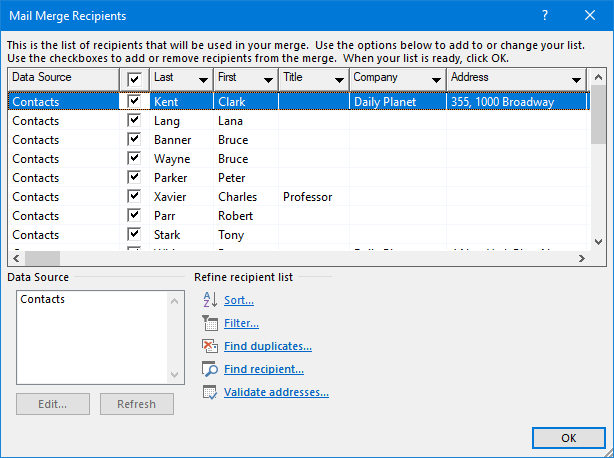
- From the dialog that opens, select your Contacts folder.
You can now select individual contacts or apply a filter to narrow down which contacts you’ll need to select/deselect.
- To show only contacts with an address, you can apply a filter;
Address is not blank - If you want to apply a filter based on Categories, you’ll have to start the process within Outlook.
- To show only contacts with an address, you can apply a filter;
- Press OK and you’ll be returned to your document which will show an empty label in the top-left corner and all other labels will say:
<<Next Record>>. - Click on the Address Block button on the Mailings tab.
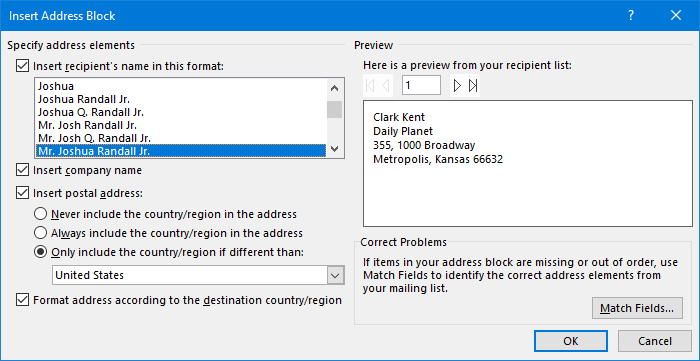
Select your Address Block options and press OK.
Click on the Update Labels button on the Mailings tab. This will add the
<<AddressBlock>>to all your labels.
- Click on the Preview Results button on the Mailings tab to see what your label will look like.
- Press on the First Record (
 ) button in the Preview Results Group if you do not see all your labels.
- Press on the First Record (
- Press on the Finish & Merge button to Print them.
- If you want to make changes to some labels, you can choose “Edit Individual Documents…” from the Finish & Merge dropdown list. This will create a fully editable Word document with the current data but is no longer linked to Outlook.
Method 2: Creating labels starting in Outlook
 As mentioned, the label creating process can also be done by starting in Outlook. The benefit of this approach is that you can already search, filter or otherwise select your contacts beforehand.
There are also some queries that can’t be done from within Word but can be done in Outlook. For instance; Selecting your contacts based on the Category that they are in.
- In Outlook, select your Contacts folder (CTRL+3).
- Perform a Search Query, apply a Filter or simply select (by holding CTRL while clicking on your individual Contacts) the contacts you want to create labels for.
- Example Search Queries;
category:="Print Label"category:="Xmas Card"NOT homeaddress:=[]NOT businessaddress:=[]
- You don’t necessarily have to do this as you’d still be able to filter or individually select contacts in Word later on but the searching/filtering capabilities is one of the main reasons why you may want to start in Outlook instead on Word.
- Example Search Queries;
- Click on the Mail Merge button on the Home tab.
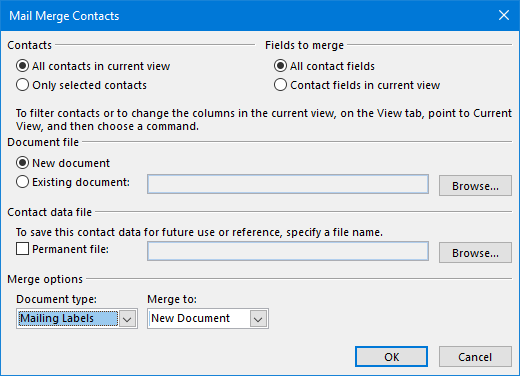
- In the Mail Merge Contacts dialog, select which contacts to use.
At the bottom of the Mail Merge Contacts dialog, make sure you set the “Document type” to: Mailing Labels
- Press OK and you’ll automatically be taken to Word to complete the label creating process.
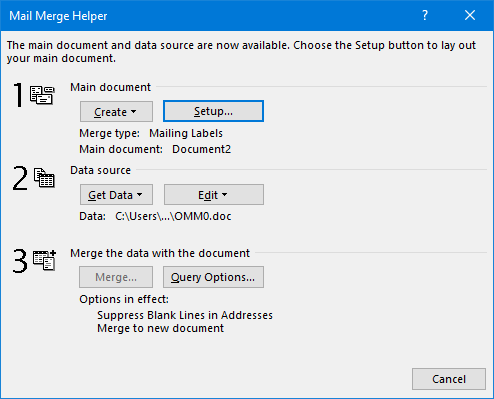
- Press OK in the information dialog about continuing in the “Mail Merge Helper” dialog.
In the Mail Merge Helper dialog, press the Setup… button.
Your label sheet layout should already be selected. If not, select it again. If you have created your own label sheet configuration in the previous step, it is listed under: Other/Custom.
- When you have a printer with multiple paper trays, you can select it here as well. When your printer has a manual feeder as well, it is recommended to use that as it usually is designed to process special or thicker paper like a label sheet.
- After selecting your label sheet configuration, press the Close button in the Mail Merge Helper dialog.
- You are now returned to your document which has the layout of your label sheet. You may not actually see the individual labels but you will see them when you enable gridlines for your document;
- tab Layout-> View Gridlines
- Optionally: Select or filter your Contacts by pressing the Edit Recipient List on the Mailings tab.
- Click on the Address Block button on the Mailings tab.
Select your Address Block options and press OK.
Click on the Update Labels button on the Mailings tab. This will add the
<<AddressBlock>>to all your labels.
- Click on the Preview Results button on the Mailings tab to see what your label will look like.
- Press on the First Record (
 ) button in the Preview Results Group if you do not see all your labels.
- Press on the First Record (
- Press on the Finish & Merge button to Print them.
- If you want to make changes to some labels, you can choose “Edit Individual Documents…” from the Finish & Merge dropdown list. This will create a fully editable Word document with the current data but is no longer linked to Outlook.
Label Printers
 If you need to print labels (almost) on a daily basis, then it might be worth investing in a dedicated label printer.
Personally, I really like the Dymo LabelWriter 450 Turbo.
It comes with DYMO Label software which integrates itself with Outlook as well and allows you to print a single address label or multiple address labels with just 2 clicks.
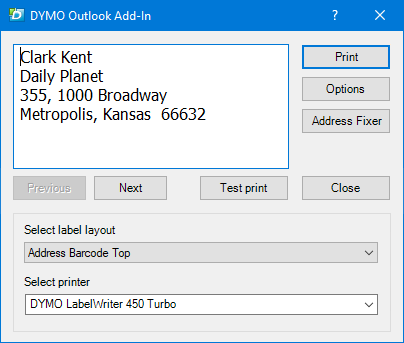
DYMO Outlook Add-In dialog for printing multiple labels.

