Highlight or Color Code emails from known Contacts
I like the concept of making it more clear which emails are from my contacts and which aren’t but I don’t like to move these emails out of my Inbox as explained in: Move emails from unknown Contacts out of your Inbox folder.
Can I highlight emails from my known Contacts in my Inbox folder instead?
 Yes, this approach is also possible when you use Color Categories. You can choose whether you want to assign a Color Category to your known or unknown contacts.
Optionally, with Conditional Formatting, you can highlight or de-emphasize the emails from your known or unknown contacts even more.
Color Categorize Known Contacts
 To Color Categorize all newly received emails from known Contacts create the following rule;
- Open the Rules and Alerts Wizard;
- Outlook 2007
Tools-> Rules and Alerts - Outlook 2010 / 2013 / 2016 / 2019 / Office 365
File-> Manage Rules & Alerts
- Outlook 2007
- Button: New Rule…
- Start from a blank rule: Apply rule on messages I receive.
- Button: Next.
- Select the condition: Sender is in specified Address Book.
- In the bottom section, click on the underlined “specified” to select your Contacts folder under “Outlook Address Book”.
- Button: Next.
- Select the action: Assign it to the category category.
- In the bottom section, click on the underlined “category” to select the
Color Category you want the message to be assigned to.- For instance, create a new Color Category called “Known Contacts” and assign it the green color.
- Button: Next.
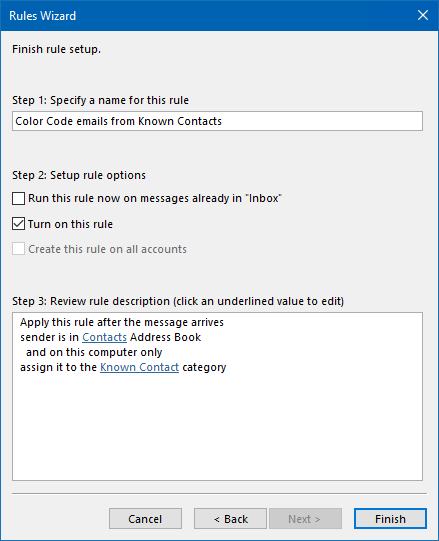
- Press Next to name your rule. For instance; Color Code email from Known Contacts.
- Press Finish to complete creating the rule.

With this Categorize rule, you can color code emails from known contacts.
Color Categorize Unknown Contacts
 To Color Categorize all newly received emails from unknown Contacts create the following rule;
- Open the Rules and Alerts Wizard;
- Outlook 2007
Tools-> Rules and Alerts - Outlook 2010 / 2013 / 2016 / 2019 / Office 365
File-> Manage Rules & Alerts
- Outlook 2007
- Button: New Rule…
- Start from a blank rule: Apply rule on messages I receive.
- Button: Next.
- Don’t select any condition and press the Next button.
- Press “Yes” to confirm that you want to apply this rule to every message you receive.
- Select the action: Assign it to the category category.
- In the bottom section, click on the underlined “category” to select the Color Category you want the message to be assigned to.
- For instance, create a new Color Category called “Unknown Contacts” and assign it the red color.
- Button: Next.
- Select the exception: Except if sender is in specified Address Book.
- In the bottom section, click on the underlined “specified” to select your Contacts folder under “Outlook Address Book”.
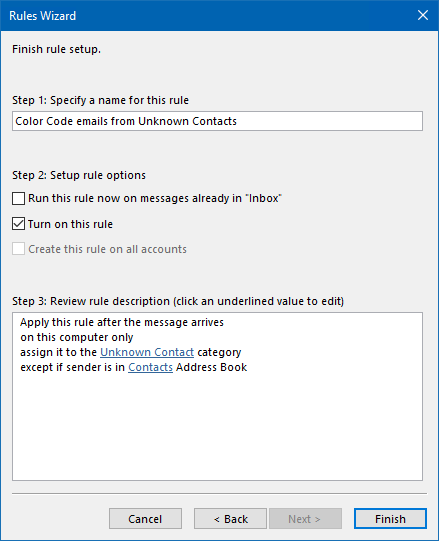
- Press Next to name your rule. For instance; Color Code emails from Unknown Contact.
- Press Finish to complete creating the rule.

With this Categorize rule, you can color code emails from unknown contacts.
Conditional Formatting for Known or Unknown Contacts
 If the Color Category label is a to subtle way of differentiating between the messages for you, you can additionally create an Conditional Formatting rule to more clearly highlight or de-emphasize the message.
- Open the Conditional Formatting dialog;
- Outlook 2007
View-> Arrange By-> Custom…-> button
Automatic Formatting - Outlook 2010 / 2013 / 2016 / 2019 / Office 365
tab View-> View Settings-> button Conditional
Formatting…
- Outlook 2007
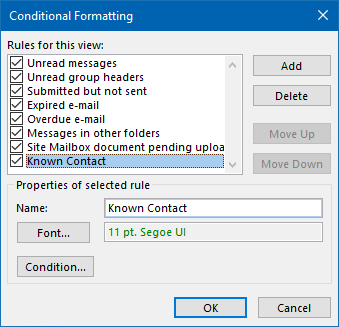
- Press the Add button and name the rule.
- For instance; Known Contact
- Press the Font… button to set the highlighting options of your choice
- For instance, set the color to green.
- Press the Condition… button and select the More Choices tab.
- Click on the Categories… button and select either your “Known Contacts” or “Unknown Contacts” Color Category depending on which you want to show in a different format.
- Press OK until all dialogs are closed and you’re returned to the Inbox.
The customized font settings will apply immediately to all messages that have the specified Color Category.

Highlight emails from known contacts with Conditional Formatting.

