Backing up and Restoring Quick Steps
I’ve created quite a few Quick Steps in Outlook 2013 on my Windows 7 computer with various template replies and actions. I now have a new Windows 11 computer with Outlook 365 on it.
How do I copy the Quick Steps from one computer to the other?
 Quick Steps are not saved as separate files on your disk but within the mailbox itself. This actually makes it really easy to migrate them for Exchange and POP3 users but quite a bit harder for IMAP accounts.
However, no matter which account type you are using, when you heavily depend on a certain feature or configuration, it is always good to know how to back up and restore it in case needed.
Some Quick Steps backups can even be shared and be used with different mailboxes without the need to reconfigure them.
Quick Steps in Exchange and POP3 mailboxes
 As Quick Steps are stored within the mailbox itself, your Quick Steps will still be there when you configure your Exchange account on your new computer; No special action is needed.
When you are using a POP3 account and reuse your original pst-file on your new computer, your Quick Steps will also be retained. However, it is however important to do this in the correct way or else they still could get lost.
For details see: Restoring a pst-file of a POP3 account on a new computer.
MFCMAPI
 In order to backup and restore Quick Steps, you’ll need to make use of MFCMAPI. This is because Quick Steps are stored in a “hidden folder” within your mailbox or pst-file.
MFCMAPI is a low-level editing tool to access your mailbox data. You can do some really great things with it, but you can also easily do large irreversible damage to your mailbox so it is important that you make a backup first and follow the below instructions carefully.
You can download MFCMAPI from its official development website on GitHub. When you are using the 64-bit version of Outlook, make sure you download the “MFCMAPI.exe.x64” version instead.
It is being developed by Stephen Griffin who is a Senior Escalation Engineer in Developer Support at Microsoft focusing on Outlook and Exchange Server APIs (in other words: this is a very reliable application source).
Backing up all Quick Steps at once
To create a backup of your Quick Steps, use the following steps.
- Open MFCMAPI.
- Accept any dialog prompts to get to the main window of MFCMAPI.
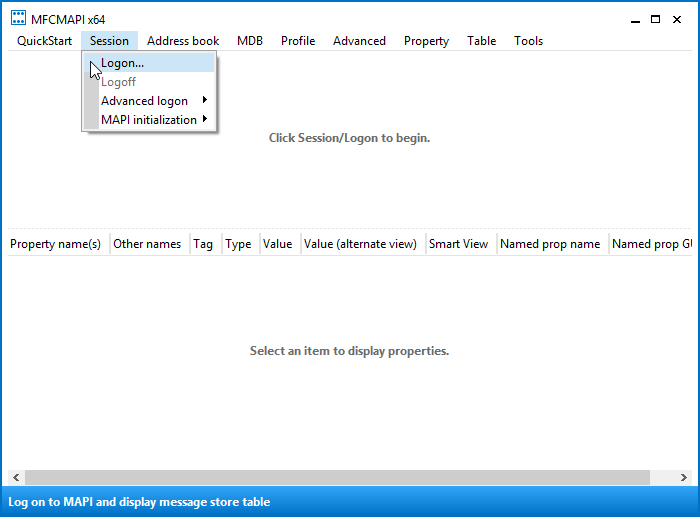
Choose: Session-> Logon…
Select the mail profile for which you want to backup its Quick Steps. If you are unfamiliar with this dialog, simply press OK.
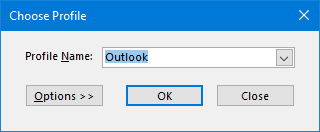
- In the top-part of MFCMAPI you should now see all your configured mailboxes and connected pst-files. Double click on the the mailbox for which you want to backup the Quick Steps.
- In the Navigation Pane on the left, expand the folder list called “Root – Mailbox” or “Root Container”.
- Expand the folder list called “Top Information Store”, “IPM_SUBTREE” or “Top of Outlook data file”.
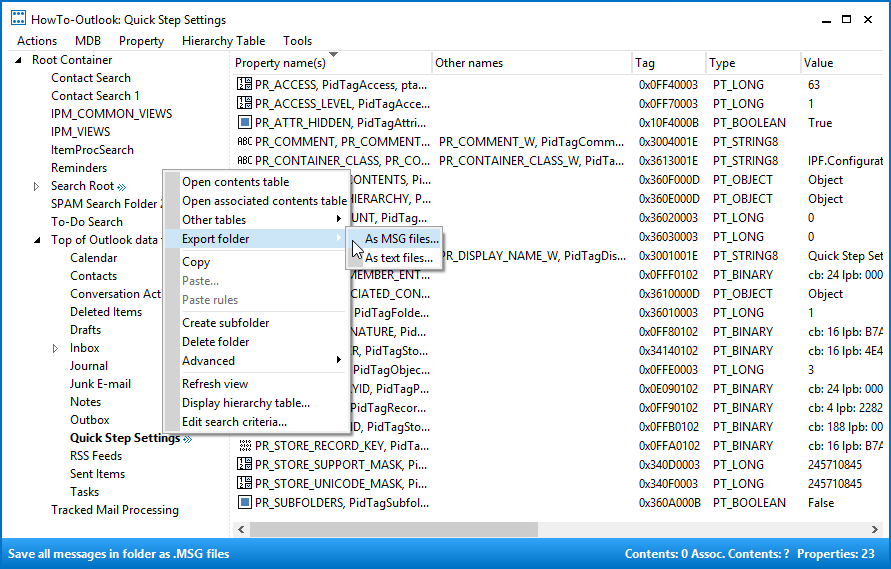
You should now see a folder called: Quick Step Settings. Right click on it and choose: Export folder-> As MSG files…
Enable both “Save associated items” and “Save as Unicode MSG”.
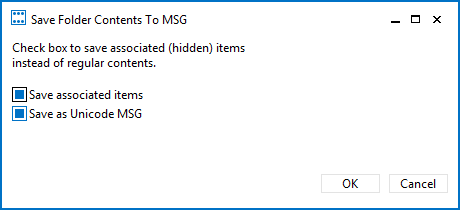
- Press OK.
- Use the Browse For Folder dialog to select a location to store your Quick Steps to. As each Quick Step will be stored as an individual msg-file, it might be wise to create a new folder for it.
- Click OK to start the Export process.
- Close all open dialogs to close MFCMAPI or repeat steps 5 to 12 for any other mailbox that you have configured in Outlook and wish to backup the Quick Steps for.
Backup only specific Quick Steps
If you want to only backup a few or a specific Quick Step (perhaps so that a colleague can import it), you can use the following steps:
- Follow step 1-7 of the backup process mentioned above.
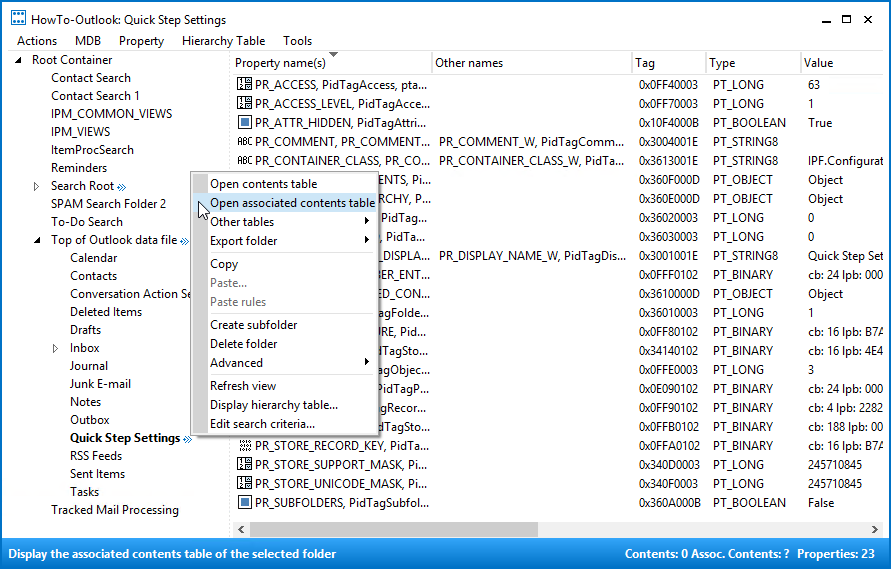
You should now see a folder called: Quick Step Settings. Right click on it and choose: Open associated contents table.
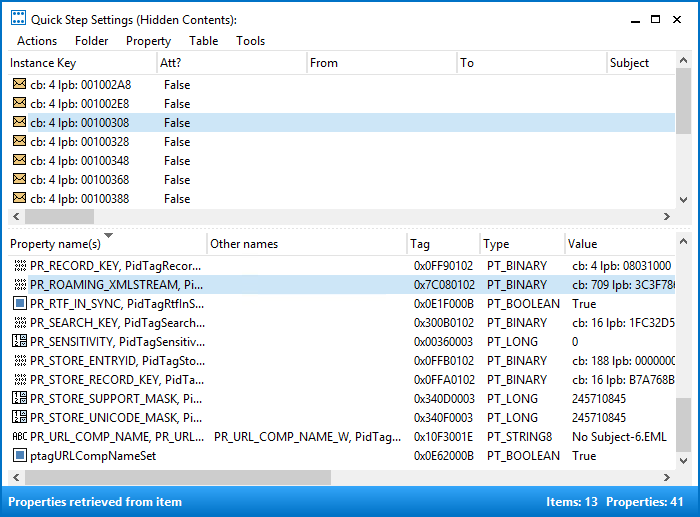
In the new dialog that opens up, you’ll see a list of messages which represent your Quick Steps.
To find out which message belongs to which Quick Step, select a message and look at the PR_ROAMING_XMLSTREAM property. You can double click on this property to see the name of the Quick Step in the Text section.
- To backup a that single Quick Step, right click on its message and choose: Export message…
- From the “Format to save” dropdown list select “MSG file (UNICODE)” and click OK.
- Select the folder where you want to save the message. You are free to rename the file to for instance:
QuickSteps-newsletters.msg - In the CopyTo dialog to set the Interface and Flags, simply press OK.
- In the Tags to Exclude dialog, simply press OK as well.
- Close all open dialogs to close MFCMAPI or repeat steps 3 to 8 for any other Quick Step you wish to backup.
Restoring Quick Steps
To restore your saved Quick Steps, use the following steps.
- Follow steps 1 to 7 of the backup process mentioned above.
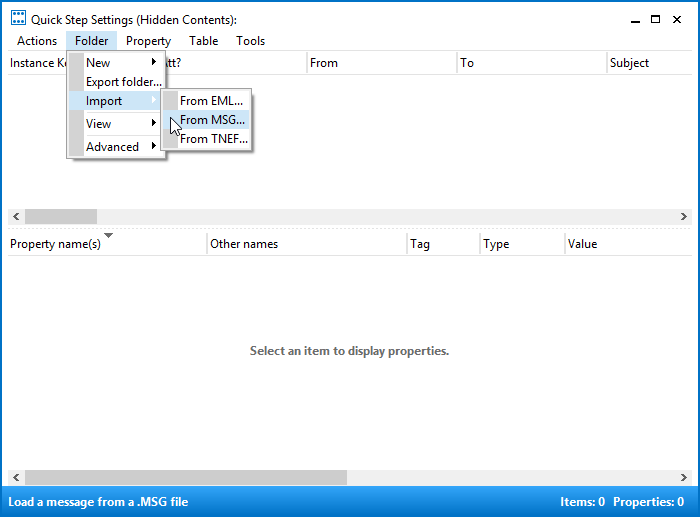
- You should now see a folder called: Quick Step Settings. Right click on it and choose: Open associated contents table.
From the menu bar select: Folder-> Import-> From MSG…
- Browse to and select your saved Quick Step file and press Open.
- Note: You can also select multiple files at once or select all the items in the folder via CTRL+A.
- Verify that the “Load style” dropdown list is set to: Load message into current folder.
- Press OK.
- Close all open dialogs to close MFCMAPI or repeat steps 1 to 6 for any other mailbox that you have configured in Outlook and wish to restore the Quick Steps for.
Note: For Quick Steps that have a move/copy to folder action, you may need to reassign the folder in your Quick Step configuration in Outlook for it to work again.

