Outlook 2013 and Outlook 2016 message list: Is it really black?
When I look at the message list in Outlook 2013, I’ve got the feeling that things aren’t as “sharp” as they should be.
It looks like the name of the sender and subject of the message isn’t really black. The characters in the emails itself look a little bit darker and clearer to me.
Is this just me needing glasses or there another option to make the characters sharper in the message list?
 I don’t think you need glasses, it’s actually quite amazing that you saw it!
The message list indeed uses a shade of gray which is very close to black. The color difference is hardly noticeable for most when it comes to reading characters. However, in the example block on the right, the difference is clearly visible.
If you prefer Outlook to actually use “real” black for the message list and have more contrast, you can quickly achieve this via Conditional Formatting.
Conditional Formatting for Read items
As the grayish black is only used for items which are marked as read, creating a rule with the condition to show items marked as read with a black font will do the trick.
The step-by-step procedure is as follows:
- Select the View tab.
- Click: View Settings
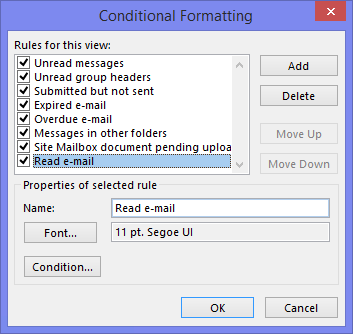
- Click: Conditional Formatting…
- Click: Add
- Name the Conditional Formatting rule.
For instance: Read e-mail - Click: Font…
- At the bottom, make sure that the color is set to Black.
- Click OK.
- Click: Condition…
- Select the More Choices tab.
- Enable the checkbox in front of: Only items that are
- Set the selection to: read
- Click OK.
- Make sure that the rule is listed directly below the default rules.
(the Move Up button will be disabled then) - Click OK to close the Conditional Formatting dialog.
- Click OK to close the Advanced View Settings dialog and to return to the main Outlook window.

Use Conditional Formatting to add a little bit of extra contrast.
Extra tip! To quickly apply this change to all your other mail folders, use View-> Change View-> Apply Current View to Other Mail Folders…
In the dialog that opens, make sure that the checkbox for your mailbox is selected and also select the option: Apply view to subfolders
Note that this excludes your Sent Items folder as it uses a different view. You’ll have to create the above rule in the Sent Items folder as well.

